|
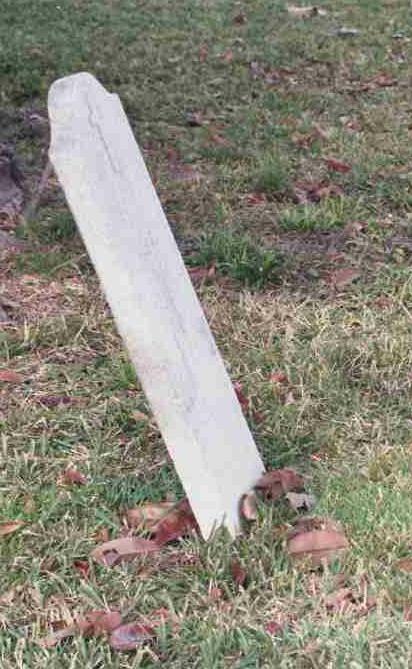
Resetting Tilted Markers
 Only
gravestones that are severely tilted should be reset since there is always the
possibility that resetting may cause other damage to the stone. Assume that all
stones are fragile and have some form of internal cracking or damage. Only
gravestones that are severely tilted should be reset since there is always the
possibility that resetting may cause other damage to the stone. Assume that all
stones are fragile and have some form of internal cracking or damage.
1. It is
absolutely critical that you dig around the stone very carefully. Steel shovels
can easily damage stone. In fact, it is best if you excavate from the backside
of the stone if at all possible --
that way, if you do slip, the mar will be on the reverse and not damage the
inscription. If a stone is leaning backwards, however, you may have to dig on
the face side since that is side away from the tilt. Regardless, always try
to keep firm earth on one side, to provide a strong, compacted earth face
against which to reset the stone.
 2. Keep
the sod and set it aside separately. Stockpile the spoil on a plastic tarp or in
a wheelbarrow. Do not allow it to get mixed with the surrounding grass. Not only
does this look unprofessional and inappropriate in a cemetery setting, but you
may need this soil for backfilling. 2. Keep
the sod and set it aside separately. Stockpile the spoil on a plastic tarp or in
a wheelbarrow. Do not allow it to get mixed with the surrounding grass. Not only
does this look unprofessional and inappropriate in a cemetery setting, but you
may need this soil for backfilling.
3. Once
the stone is free of earth, carefully remove it from the ground and lay it
aside, outside the work area, on several 2x4s to support it. This will also make
it easier to pick up again later. Examine the stone for any writing or carving
that might have been obscured by soil.
4. If
necessary, you may excavate the hole a little more --
usually about 3 to 6 inches deeper and about 6 inches more in diameter, but
remember to leave one side compact.
5. You
want to create a firm base for the stone and one that will evenly distribute its
weight. If the base of the stone is relatively flat, set an even layer of bricks
as a base, then about an inch of sand. If the base of the stone is pointed, then
you may need to use only gravel and sand.
 6.
Replace the stone in the hole, be sure that enough stone remains below ground to
support the upper portion and prevent it from retilting once it's reset. For
eighteenth century stones about 40% of the stone was below ground level --
the amount buried is reduced through the nineteenth and twentieth centuries. 6.
Replace the stone in the hole, be sure that enough stone remains below ground to
support the upper portion and prevent it from retilting once it's reset. For
eighteenth century stones about 40% of the stone was below ground level --
the amount buried is reduced through the nineteenth and twentieth centuries.
7.
Position the stone level both vertically and horizontally. Use a builder's
level to check.
8. Refill
the excavation using the original spoil. It may be necessary to use occasional
bricks or gravel to help assist holding the stone upright. Gravel may also
assist in drainage around the stone, especially in heavy, clay soils. Tamp this
material every few inches to ensure that it is well settled around the stone. Be
careful with the tamping, however, to prevent damage to the stone.
 9. Fill
to encourage drainage away from the stone and reset the sod. All remaining spoil
should be carried away. 9. Fill
to encourage drainage away from the stone and reset the sod. All remaining spoil
should be carried away.
Leveling a Monument
Some monuments require little more than releveling. Your first
decision must be whether you can handle the task in a manner that will be safe
for both you and the monument. If in doubt, do nothing and hire a stone
conservator.
If, however, the monument is small and you have the
appropriate tools, then here are some suggestions.
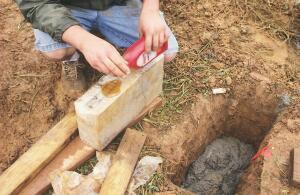
1. While a level is often a vital tool, it is also important
to realize that a monument is generally considered level when it appears level
with respect to the surrounding terrain.
2. While steel pry bars are often used, they should only be
used when you can ensure that the monument will not be damaged. Otherwise, it
will be necessary to use a hoist and straps -- and this requires more equipment,
skill, and care.
3. If the monument has no foundation it can generally be
leveled using screenings, small pea gravel, or similar material. The key is to
add material in shallow fills and ensure that the screenings are tamped down
between lifts. If there is a previous concrete foundation and it, too, has
slumped into the grave, then it will generally be necessary to remove the
concrete and pour a new foundation. This is more complex and you probably should
consult a conservator.
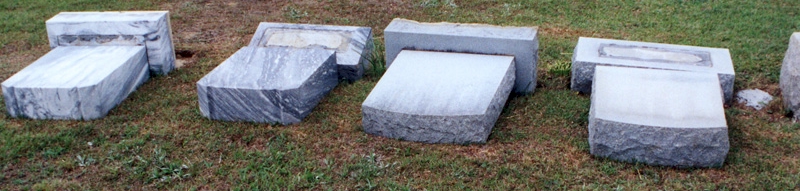
Resetting Broken Markers
in a Concrete Tab
Some markers are broken off at ground level and found laying
flat in the cemetery. This exposes them to damage from mowers, pedestrians, as
well as increased damage from acid rainfall. Such stones may be good candidates
for resetting in a new socket. First, you need to be certain that other than the
one break, the stone is otherwise sound -- there should be no cracks, spalling,
or other damage.
Another condition is that the stone must be able to be reset
without hiding or burying any of the inscription.
If your stone meets these two conditions, creating a new
socket for the stone is really pretty easy and involves essentially two steps --
creating the socket and them resetting the stone.
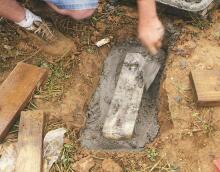
1. Identify the location where the stone is to be reset and
excavate a hole 6-10 inches longer than the width of the tablet and 6-10 inches
wider than the thickness. The excavation should be about 8 inches in depth. This
hole will serve as a "ground form" for commercial gray Portland cement (this is one
of the few instances where Portland cement is appropriate in
cemetery preservation efforts).
 2.
Prepare a wood form to create a slot in the concrete. This slot will be used to
hold the stone upright. The wood can consist of 2x6s or 2x8s depending on how
deep the socket needs to be to provide support to the stone. You will likely
also need to use shims to make the form about �-inch
wider on each of the four sides than the stone (in other words, the slot in the
concrete form will be �-inch larger than the
stone). Oil the wood so it will more easily slip out of the ground form as the
concrete sets up. 2.
Prepare a wood form to create a slot in the concrete. This slot will be used to
hold the stone upright. The wood can consist of 2x6s or 2x8s depending on how
deep the socket needs to be to provide support to the stone. You will likely
also need to use shims to make the form about �-inch
wider on each of the four sides than the stone (in other words, the slot in the
concrete form will be �-inch larger than the
stone). Oil the wood so it will more easily slip out of the ground form as the
concrete sets up.
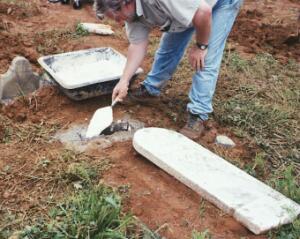
 3. Place
several inches of concrete at the base of the ground form, set in the prepared
wooded slot, and fill the ground form with concrete to within a couple inches of
the ground level (be certain that your slot form extends up beyond the concrete
so you can remove it). Allow the concrete to set up for several hours and remove
the wood form when the concrete will hold its shape (if you wait too long
removing the wood form will become very difficult; if you attempt to remove it
too soon, the wet concrete will slump). Allow the form to set up for at least 24
hours and preferably 72 hours. 3. Place
several inches of concrete at the base of the ground form, set in the prepared
wooded slot, and fill the ground form with concrete to within a couple inches of
the ground level (be certain that your slot form extends up beyond the concrete
so you can remove it). Allow the concrete to set up for several hours and remove
the wood form when the concrete will hold its shape (if you wait too long
removing the wood form will become very difficult; if you attempt to remove it
too soon, the wet concrete will slump). Allow the form to set up for at least 24
hours and preferably 72 hours.
4. The next step is to prepare a mortar mix that will retain
the stone in the prepared socket. One appropriate mortar is a 1:3 mix of natural
hydraulic lime (NHL) and sand. Natural hydraulic limes are rated by how
hydraulic they are -- 2.0, 3.5, and 5 -- with the higher numbers representing a
more hydraulic (and stronger) set. We recommend a NHL with a rating of 2 -- one
that is weakly hydraulic. One source for this NHL is
Virginia Lime Works.
This setting mortar is softer than the stone and any failure is likely to occur
in the mortar, preventing the stone from being broken. Another alternative that
you will see referenced in much preservation literature is a 1:2:9 mix of white (NOT gray) Portland
cement : hydrated lime : clean sand. This mix uses white Portland cement (ASTM
C-150, Type II) since it does not contain sulfates or other soluble
 salts that
can cause staining and efflorescence. The hydrated lime (ASTM C-207, Type S)
helps provide high plasticity and water retention with a safe degree of
strength. The concern with the use of Portland cement to gauge the mortar
(increasing the speed of the set) is that some research suggests that this
dramatically reduces the longevity of the mortar. The use of a NHL mix is
preferred. salts that
can cause staining and efflorescence. The hydrated lime (ASTM C-207, Type S)
helps provide high plasticity and water retention with a safe degree of
strength. The concern with the use of Portland cement to gauge the mortar
(increasing the speed of the set) is that some research suggests that this
dramatically reduces the longevity of the mortar. The use of a NHL mix is
preferred.
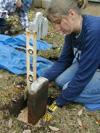
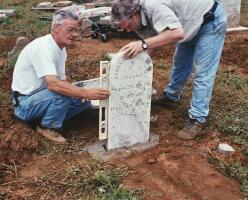 5.
Place mortar mix in the base and on the sides of the slot, set the marker, and
ensure that it is straight. If necessary, additional mortar can be added to the
sides of the slot and small pieces of soft waste stone or plastic shims can be used to
hold the stone in position while the mortar sets. 5.
Place mortar mix in the base and on the sides of the slot, set the marker, and
ensure that it is straight. If necessary, additional mortar can be added to the
sides of the slot and small pieces of soft waste stone or plastic shims can be used to
hold the stone in position while the mortar sets.
6. Never set a
stone directly into cement. Not only does gray Portland cement
contain impurities that will harm the stone, but the set concrete is far
stronger than the stone. Any pressure to the stone (such as being hit by a lawn
mower) will result in the stone snapping off at the base.
The
use of a form and an appropriate mortar mix helps ensure that the stone won't be
damaged.
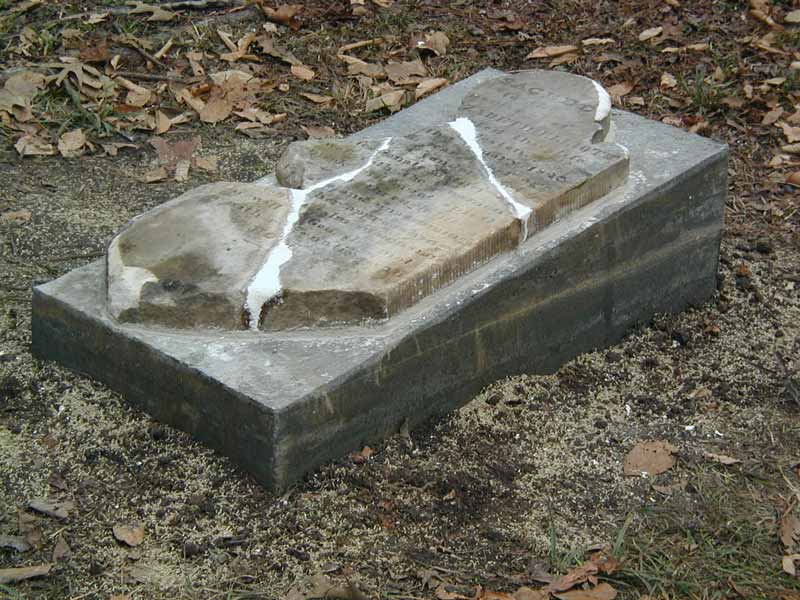
Resetting
Badly Broken Markers
Some headstones are so damaged that resetting in a tab as
described above is simply not possible. One alternative is to reset them near
horizontal on (but NOT in) a concrete slab. There are several techniques for
this and the particular design will need to suit the circumstances. Here is one
example.
1. Begin by laying out the various fragments and determining
the overall size of a support necessary. In this case the decision was made to
create a support that was canted about 6-inches over about 3-feet and that was
about 6-inches in height at the base and about a foot high at the head.
2. A form was created over a below grade excavation. Because
of the size of the concrete support being created, threaded stainless steel rod
was used to help reinforce the concrete pour.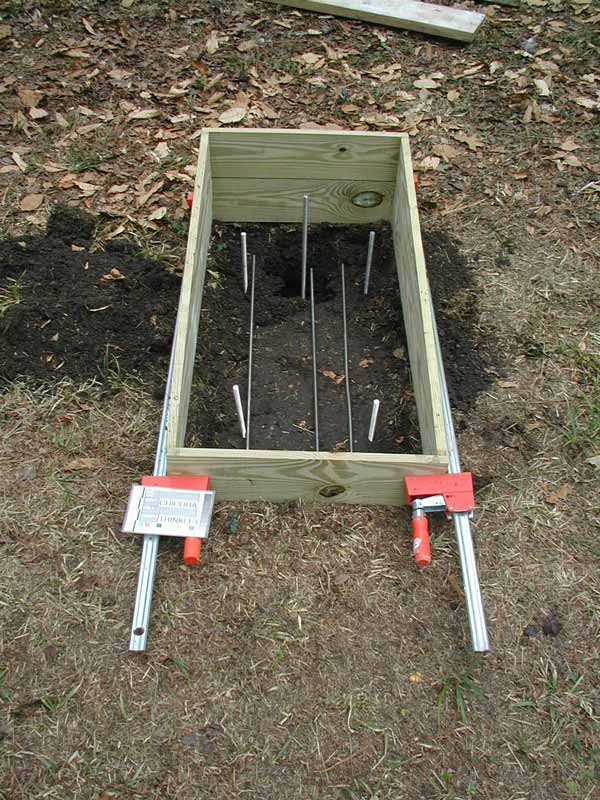
3. We used a normal "ready-mix" type concrete, but you might
want a fiberglass reinforced mix to eliminate the need for other reinforcement.
After the concrete is poured and set, the form is removed and the ledger is
arranged on the concrete, set in a mortar mix. One appropriate mortar is a 1:3
mix of natural hydraulic lime (NHL) and sand. Natural hydraulic limes are rated
by how hydraulic they are -- 2.0, 3.5, and 5 -- with the higher numbers
representing a more hydraulic (and stronger) set. We recommend a NHL with a
rating of 2 -- one that is weakly hydraulic. One source for this NHL is
Virginia Lime Works.
This
 setting
mortar is softer than the stone and any failure is likely to occur in the
mortar, preventing the stone from being broken. setting
mortar is softer than the stone and any failure is likely to occur in the
mortar, preventing the stone from being broken.
4. Afterwards the stone is infilled using an appropriate
conservation mortar, such as Jahn or U.S. Heritage. For this you will need a
stone conservator.
You may also select a lower, less canted basal support. In
such a reset, the stone is said to be "floated" on a lime-based mortar bed. A
4-inch concrete foundation, the outline of the stone, is poured and allowed to
cure. The surface of this slab is canted -- generally about 1-inch for every
1-foot. It is important to cant the bed to ensure that there is positive
drainage and water (that is typically acidic) does not collect on the face of
the monument. The stone fragments are then reassembled snuggly on a bed of
lime-based mortar. Cracks and losses are infilled using an appropriate
conservation mortar.
|